Paper FingerPhone
Series: alt.ctrl activities; builds on Stylophone
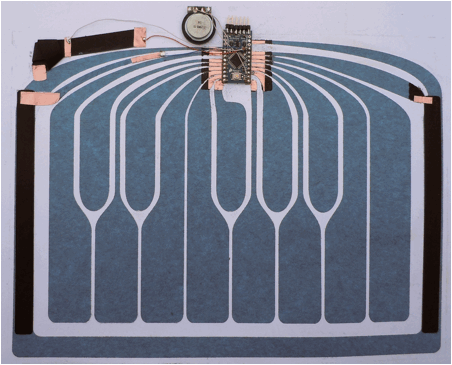
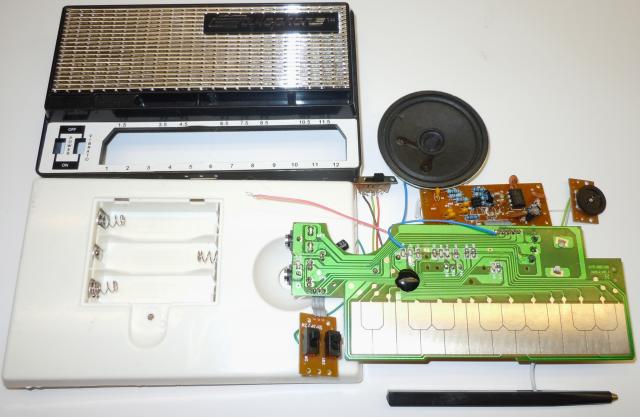
The FingerPhone reworks the Stylophone, a 1970s stylus keyboard toy, in conductive paper. The fingers replace the Stylophone's metal stylus and its wire: each key is sensed by its electric field, with no extra parts. One 8-bit Atmel microcontroller senses touch and pressure, synthesizes the oscillators, and drives the sound transducer directly, as a class D amplifier. The Stylophone has 65 components; a production FingerPhone would have six.
The paper does many jobs at once: it is the playing surface, the markings the player sees and feels, the sounding board, and the base for the electronics. The first FingerPhone was built into a recycled pizza box; the one shown at NIME 2012 was part of its own poster, which won the Best Poster award.
Materials
| Item | Amazon | Adafruit | SparkFun |
|---|---|---|---|
| Blue conductive paper, for the keys and for the wipers of the slide potentiometers. The FingerPhone's was a carbon-fibre paper from Kimberly-Clark, around 70 Ω per square, which seems no longer to be available | |||
| A replacement must be far more conductive than the usual conductive papers: Teledeltos is around 6 kΩ per square, PASCO's field-mapping paper over 2 kΩ per square. Wet-laid carbon-fibre veils come close, for example Fibreglast's Carbon Fiber Veil 1064 (under 35 Ω per square) and James Cropper's OPTIVEIL 20332A (40 to 80 Ω per square); neither has been tried in a FingerPhone | |||
| Black carbon-loaded resistive paper, for the slide potentiometers and the knot pressure sensor | |||
| A light, stiff board to resonate: the lid of a pizza box, a cigar box, a musical greeting card, or cardboard | |||
| A small board with an 8-bit Atmel (AVR) microcontroller and a USB connector; the prototype used "a small, readily available printed circuit board", and the knot-sensor demonstration uses a Teensy with the Arduino tool chain | |||
| A sound transducer that bends the board: a distributed-mode (bending-wave) driver, or a thin piezo transducer | |||
| Copper foil tape with conductive adhesive, for the connections | 1128 | PRT-13827 | |
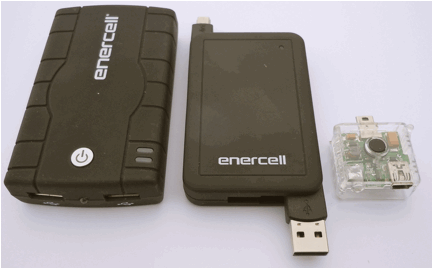
| A USB power bank, shared with other devices, instead of batteries |
Tools
- Scissors
- Soldering iron
- An MCU IDE
- A desktop plotter/cutter (optional), for cutting keyboards to size
Skills
- Cutting and laying out paper circuits
- Soldering
- Programming an MCU: capacitive sensing and sound synthesis
Instructions
- Choose the sounding board: a light, stiff surface that would otherwise be thrown away, such as the lid of a pizza box.
- Lay out the keyboard at finger size: then the white keys between the black ones can be played too. Cut each key from conductive paper, with a narrow gap around it and a narrow trace running from it to where the microcontroller will sit; cut by hand or with a desktop cutter, and try a few sizes.
- Glue the keyboard to the sounding board, and connect each key's trace to its own microcontroller pin with conductive copper tape.
- Make the pitch and volume slide potentiometers: float a strip of black resistive paper, with copper-tape connections at its ends, over a strip of the blue conductive paper, which is the wiper. Pressing the black strip onto the blue paper picks off a point along it.
- Make the vibrato control: tie an overhand (thumb) knot in a strip of black carbon-loaded paper and flatten it into a pentagon, then make three connections to it. With three connections no pull-up resistor is needed, and the reading is a ratiometric measure of the pressure. A video shows how: Conductive Paper Pressure Sensor and Arduino Teensy.
- Fix the transducer to the sounding board and drive it straight from a PWM pin: the microcontroller is the amplifier.
- Program the touch sensing without resistors or capacitors: use each pin's built-in pull-up resistor and the capacitance between a key and its neighbours, and shape each note's envelope from that touch signal.
- Program the sound: oscillators that step a 24-bit phase through sine and triangle tables, or use the phase directly, or clipped, for sawtooth and pulse waves. Two voices (duophony) let notes overlap for legato.
- Power it from a USB power bank. The USB port can also send OSC or MIDI to other synthesizers.
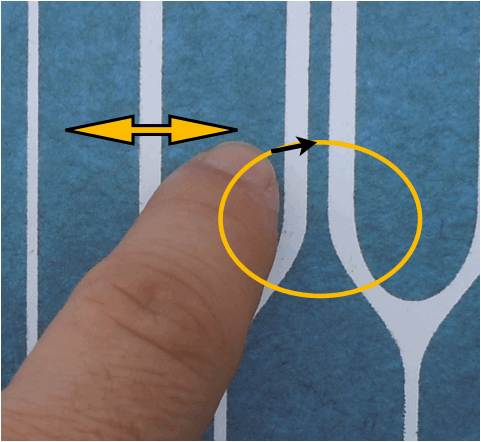
- Play: slide elliptical and back-and-forth gestures across neighbouring keys for trills and runs, as Dobro and lap-steel guitar players do for vibrato and trills.

Variations
- Print the keyboard instead of cutting it: screen-print conductive ink through a laser-cut stencil, as with Bare Conductive ink, or a water-based carbon-loaded ink.
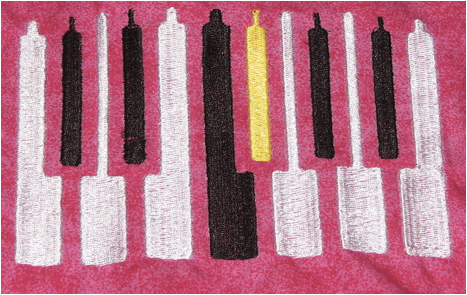
- Embroider the keyboard with silver-plated nylon thread.
- Make it in several sizes, made to measure, as the jarana players of Mexico do for their families.
- Make it fold for carrying, like roll-up keyboards.
- Toward production: a chip-on-board microcontroller, a piezo transducer whose paper connections are shaped to filter the class D noise, and a ring of perforations around the electronics so they can be separated before the paper is recycled.
- A circuit-board FingerPhone can be bought: see A FingerPhone you can buy! and Routing the FingerPhone.
Related resources
- The Paper FingerPhone: a case study of Musical Instrument Redesign for Sustainability, NIME 2012 (PDF)
- Conductive Paper Pressure Sensor and Arduino Teensy: a video on making the knot pressure sensor
- The Paper FingerPhone, a sustainably designed electronic Musical Instrument and First Paper Fingerphone Prototype: videos
- Influence: Bare Conductive: the keyboard printed with conductive ink
- Stylophone (Wikipedia)
Coding Prompt Build Block
A prompt to give a coding assistant, to start the code for this activity. Copy the box, answer its questions about your board and pins, and test what comes back on the bench before you rely on it.
I am building "Paper FingerPhone", the activity at https://adrianfreed.com/build-paper-fingerphone.html.
Write a program for an 8-bit AVR microcontroller board with USB that is a whole instrument: it senses touch on conductive-paper keys, reads the pitch and volume slide potentiometers and a knot pressure sensor, synthesizes the sound, and drives a sound transducer straight from a PWM pin, as a class D amplifier. The knot sensor has three connections, so it needs no pull-up resistor, and its reading is a ratiometric measure of the pressure.
Touch, with no resistors or capacitors: use each key pin's built-in pull-up resistor and the capacitance between a key and its neighbours, and shape each note's envelope from the touch signal.
Sound: oscillators that step a 24-bit phase through sine and triangle tables, or use the phase directly, or clipped, for sawtooth and pulse waves. Two voices, so that notes can overlap for legato. Optionally, also send the notes as MIDI or OSC over USB.
Libraries to explore:
- ADCTouch: touch sensing on an AVR's analog pin with no external parts: it charges the pin through the built-in pull-up and shares the charge with the ADC's own capacitor (https://github.com/martin2250/ADCTouch)
- CapacitiveSensor: touch and proximity sensing with two pins per sensor, a send pin through a large resistor and a receive pin (https://github.com/PaulStoffregen/CapacitiveSensor)
- Mozzi: sound synthesis on the microcontroller: oscillators, wavetables, envelopes and filters, with PWM, DAC and I2S output modes (https://github.com/sensorium/Mozzi)
- MIDIUSB: makes a board with native USB, such as the Leonardo, Micro, Due or Zero, a USB MIDI device (https://github.com/arduino-libraries/MIDIUSB)
- OSC for Arduino (CNMAT): encodes and decodes OSC messages, and sends them over USB or hardware serial (framed with SLIP) or over Ethernet and Wi-Fi UDP; its Applications folder has Max/MSP and Pd examples that receive them (https://github.com/CNMAT/OSC)
Before writing anything, ask me what I am using: the board and its pins, or the software (such as Max, Pd or Python), and check its documentation for what this needs. Put the pin numbers, ranges and other settings in one block at the top, each with a comment. Say which of the libraries above you use, and why. Start with a test that shows the raw readings, so that I can check the wiring and the ranges before the rest.
This activity by Adrian Freed is licensed under Creative Commons Attribution-NonCommercial-ShareAlike 4.0 International (CC BY-NC-SA 4.0): you may share and adapt it with attribution, for non-commercial purposes such as personal projects and teaching, and you must share adaptations under the same licence. Product names and links belong to their suppliers.